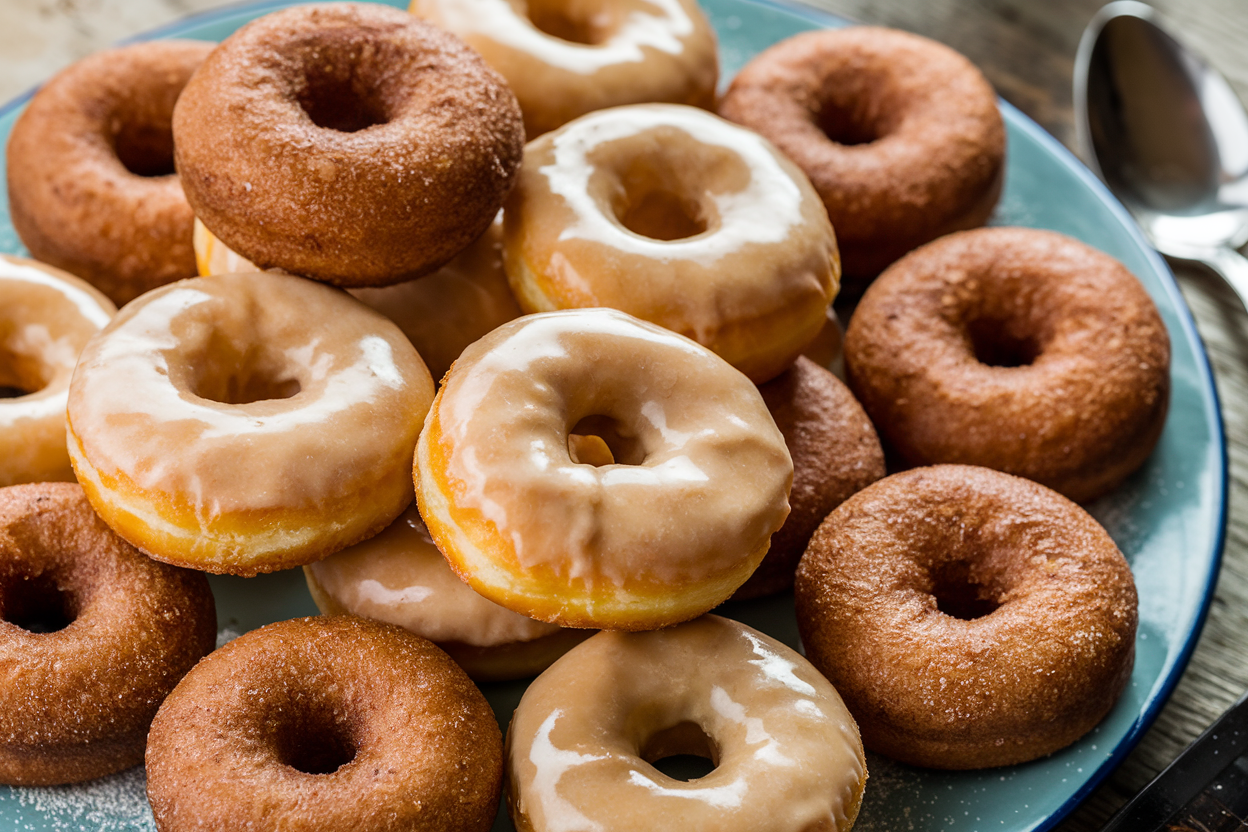
Easy Homemade Donut Recipe (No Fryer Needed)
Donuts. The very word conjures images of warm, soft dough with that perfect sugary glaze melting in your mouth. What if I told you that making these heavenly rings of joy at home is not just possible, but downright easy?
Forget expensive gadgets and ingredient lists that read like a chemistry exam. This recipe brings you classic, fluffy donuts with minimal effort and maximum wow-factor. Ready to stop drooling over bakery windows and start making your own?
Let’s get that dough rolling!
The Secret Behind This Recipe
Here’s the deal: most fancy donuts rely on complicated yeast starters or deep-fryer sorcery. But the real secret? Patience, proper resting time, and a combination of baking powder and yeast.
This dynamic duo ensures your donuts are light, airy, and ridiculously tender. Plus, we use simple pantry staples and shallow frying techniques to keep things accessible for novice chefs or busy weekend bakers. So the next time your friends ask how you made such perfect donuts, just wink and say, “It’s a secret… but kinda not.”
What Goes Into This Recipe – Ingredients
- 2 ½ cups all-purpose flour
- 2 ¼ teaspoons active dry yeast (1 packet)
- ½ cup warm milk (about 110°F/43°C)
- ¼ cup granulated sugar
- 2 tablespoons unsalted butter, melted
- 1 teaspoon salt
- 2 large eggs
- 1 teaspoon vanilla extract
- Oil for frying (vegetable or canola)
- Powdered sugar, cinnamon sugar, or glaze for topping
Step-by-Step Instructions
- Activate the yeast: In a small bowl, combine warm milk, a teaspoon of sugar, and yeast.
Stir and let it sit for about 5 minutes until frothy—if it doesn’t bubble, your yeast might be dead. RIP yeast.
- Mix dry ingredients: In a large bowl, whisk together flour, remaining sugar, and salt.
- Combine wet ingredients: In another bowl, beat eggs, melted butter, and vanilla extract.
- Bring it together: Add the yeast mixture and wet ingredients into the flour mix. Stir until a dough forms.
- Knead the dough: Turn the dough onto a floured surface and knead for about 5 minutes until smooth and elastic.
If it’s sticky, add a bit more flour.
- Rest and rise: Place the dough in a lightly greased bowl, cover with a cloth, and let it rise in a warm spot for 1 to 1.5 hours or until doubled in size.
- Shape your donuts: Roll the dough out to about ½ inch thickness. Use a donut cutter or two round cutters (one large, one small) to cut out donut shapes and holes.
- Second rise: Lay your donuts on parchment paper, cover, and let them puff up for 30 minutes.
- Heat the oil: In a deep skillet or pot, heat oil to 350°F (175°C). Use a thermometer if you have one—risky business otherwise.
- Fry the donuts: Carefully lower donuts into the oil (don’t overcrowd!).
Fry for about 1 minute per side until golden brown.
- Drain and cool: Place fried donuts on paper towels to drain excess oil.
- Finish with toppings: Toss them in powdered sugar, cinnamon sugar, or dip in your favorite glaze while still warm.
- Enjoy immediately: Trust me, fresh homemade donuts are a serious game changer.
Storage Instructions
Homemade donuts are best eaten fresh, but life isn’t always perfect. Store leftovers in an airtight container at room temperature for up to 2 days. If you want to keep them longer, freeze your glazed or plain donuts individually wrapped in plastic wrap and then a freezer bag.
When you’re ready, thaw at room temperature and even give them a quick zap in the microwave for that fresh-baked illusion. FYI, soggy donuts are nobody’s friend—skip the fridge, as it makes them hard and sad.
Health Benefits
Look, donuts aren’t exactly health food, but you can score some wins here. This recipe uses fresh ingredients—no preservatives or mystery fillers.
Because you control the oil quality, you can opt for heart-healthy oils or baker’s shortcut options like shallow frying to reduce absorption. Also, homemade donuts mean no suspicious mystery sugars or artificial flavors sneaking in. If you swap out glazed sugar for powdered cinnamon or nutmeg, it’s a slightly less sugar-bomb indulgence.
Remember, moderation is your BFF.
What Not to Do
- Don’t skimp on the yeast activation – ignoring this step is like trying to fly without wings.
- Never overcrowd the frying pot. Your donuts will turn soggy and greasy faster than you can say “second helping.”
- Don’t fry at temperatures too low or too high. Under 350°F, donuts soak up oil like a sponge; over 375°F, they burn on the outside but stay doughy inside, aka donut disappointment.
- Avoid fridge storage.
It kills softness and makes your precious donuts taste like a sad brick.
- Don’t skip the resting periods. If you’re impatient, your donuts will be dense—boring is cruel.
Recipe Variations
- Glazed Chocolate Donuts: Add cocoa powder to your dry mix and dip fried donuts in a rich chocolate glaze.
- Stuffed Donuts: Before the second rise, gently press an indentation and add jam, Nutella, or cream cheese. Seal and fry as usual.
- Baked Donuts: Want something lighter?
Roll the dough thinner and bake at 375°F for 10-12 mins—still delicious but with less guilt.
- Spiced Donuts: Add cinnamon, nutmeg, or cardamom to the dough for a fall-inspired twist that smells like heaven.
- Vegan Version: Substitute milk with almond or oat milk, replace eggs with flax eggs, and use oil instead of butter. The texture will shift slightly, but flavor wins.
FAQ
Can I use self-rising flour instead of all-purpose flour?
Self-rising flour already has baking powder and salt in it, so it throws off this recipe’s balance. Stick with all-purpose flour for the best donut texture and rise.
What’s the difference between baking powder and yeast in donuts?
Yeast provides that classic fluffy, airy texture thanks to fermentation, while baking powder acts faster by chemically creating bubbles during cooking.
Together, they give you a light donut quickly without that heavy yeast dough wait.
Can I bake these donuts instead of frying?
Absolutely! Baked donuts are a tasty alternative and a bit healthier. Just roll the dough thinner, cut shapes, and bake at 375°F for about 10-12 minutes.
They won’t have a crispy outside but are still delicious.
Why are my donuts tough or dense?
Most likely because of under-proofing (not letting the dough rise enough), over-kneading, or frying at incorrect temperatures. Patience and precise frying temperatures are key.
Can I make the dough ahead and refrigerate it?
Yes, you can let the dough rise slowly overnight in the fridge. Just bring it to room temp before shaping and frying.
This can even help develop flavor, so it’s a nice little hack.
Final Thoughts
Making donuts at home isn’t just for professionals or people with kitchen gadget hoards. This recipe turns your kitchen into a mini-donut heaven with approachable ingredients and straightforward steps. The payoff?
Warm, fluffy, sweet treats that make you question why you ever bothered with store-bought ones. Bonus: the satisfaction of bragging rights when your friends ask for the recipe. Remember to avoid the pitfalls, experiment with toppings, and, most importantly, eat ‘em while they’re still warm because—let’s be real—cold donuts are basically a cruel joke.
Enjoy the sugary ride!
Printable Recipe Card
Want just the essential recipe details without scrolling through the article? Get our printable recipe card with just the ingredients and instructions.