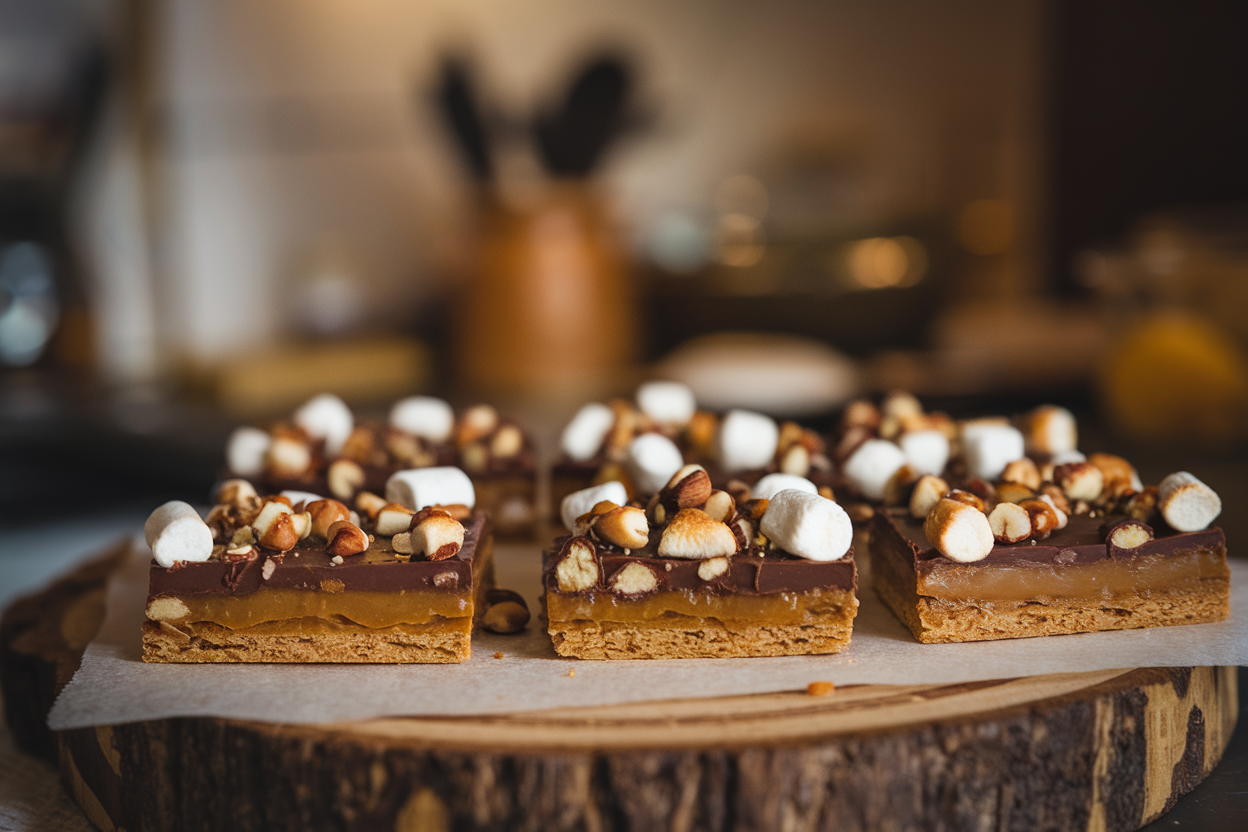
Meet Your New Bake-Sale Flex: Chocolaty Caramel-Nut S’more Bars That Everyone’s Raving About: Irresistibly Chewy & Gooey
You want a dessert that shuts down excuses and lights up faces? This is it. Imagine a classic campfire s’more went to culinary school, lifted weights, and started dripping with caramel swagger.
These Chocolaty Caramel-Nut S’more Bars pack crunch, goo, and melt in every bite—no smoky hair or singed marshmallows required. They bake fast, slice clean, and travel like a champ. Make a pan and watch them “mysteriously” vanish.
What Makes This Special
These bars level up the s’more blueprint by stacking flavor and texture like a Jenga tower built by a chef.
You get a buttery graham crust, a salted caramel layer that hugs roasted nuts, and a thick blanket of chocolate with toasted marshmallows on top. The ratio isn’t random—it’s engineered for snap, chew, and melt.
They also scale easily, freeze well, and look bakery-grade without requiring a pastry degree. And the ingredient list is grocery-store simple.
Translation: maximum wow with minimal drama.
Ingredients
- Graham cracker crust: 2 cups graham cracker crumbs, 8 tablespoons (1 stick) unsalted butter melted, 2 tablespoons granulated sugar, pinch of fine sea salt
- Caramel layer: 1 cup soft caramels (about 25–30 pieces) or 10 oz caramel bits, 2 tablespoons heavy cream, 1/2 teaspoon vanilla extract, 1/2 teaspoon flaky or fine sea salt
- Nuts: 3/4 cup roughly chopped roasted nuts (peanuts, pecans, or almonds)
- Chocolate layer: 1 1/2 cups semisweet or dark chocolate chips, 1 tablespoon coconut oil or butter
- Marshmallow topping: 3 cups mini marshmallows (or 12–14 large, halved)
- Optional extras: 1/3 cup mini chocolate chips for sprinkling, extra flaky salt for finishing
How to Make It – Instructions
- Prep your stage. Heat oven to 350°F (175°C). Line a 9×9-inch pan with parchment, leaving overhang for easy lifting. Lightly grease the sides.
- Build the crust. In a bowl, mix graham crumbs, sugar, salt, and melted butter until it looks like wet sand.
Press firmly into the pan. Use a flat-bottom glass to compact the surface.
- Pre-bake. Bake the crust for 8–10 minutes until lightly golden and fragrant. Set aside to cool slightly.
- Make the caramel. In a microwave-safe bowl, heat caramels and heavy cream in 30-second bursts, stirring until smooth.
Stir in vanilla and salt. Alternatively, melt gently on the stovetop.
- Layer the nuts. Scatter chopped nuts evenly over the warm crust. Pour the caramel over the nuts, nudging it into corners with a spatula.
It doesn’t need to be perfect; it will settle.
- Melt the chocolate. Combine chocolate chips and coconut oil/butter; melt in 20–30-second intervals, stirring until glossy.
- Chocolate blanket. Pour melted chocolate over the caramel. Smooth it into one even layer. Optional: sprinkle mini chocolate chips for extra texture.
- Marshmallow crown. Arrange mini marshmallows in a tight layer over the chocolate.
No gaps if you can help it—that’s how you get that bakery look.
- Toast and set. Return the pan to the oven for 4–6 minutes until marshmallows puff and lightly brown. For deeper toast, broil on low for 30–60 seconds, watching like a hawk.
- Chill for clean cuts. Cool at room temp for 30 minutes, then chill 45–60 minutes until the chocolate sets. Lift out with parchment and slice with a hot, oiled knife.
Keeping It Fresh
Store at room temperature in an airtight container for up to 3 days.
If your kitchen is warm, refrigerate to keep the chocolate firm, then let bars sit 10 minutes before serving so the caramel softens. For longer storage, freeze bars individually wrapped for up to 2 months.
Pro move: Place parchment between layers so marshmallows don’t stick together like overenthusiastic roommates. And yes, these ship decently if kept cool with an ice pack.
What’s Great About This
- Texture trifecta: Buttery crumb, chewy caramel, melty chocolate, and gooey marshmallow.
It’s the dessert Avengers.
- Foolproof steps: Minimal technique, maximum payoff. Kids can help, adults can brag.
- Highly customizable: Change nuts, chocolate percentage, or add spices. It’s a template, not a prison.
- Make-ahead friendly: They set better with time, which means less last-minute chaos.
- Crowd appeal: Familiar flavors with a polished finish—great for parties, potlucks, or your 3 p.m. “meeting.”
Avoid These Mistakes
- Skipping the crust pre-bake: You’ll get a soggy, crumbly base.
We want crisp, not chaos.
- Overheating the caramel: Burnt caramel turns bitter fast. Gentle heat, frequent stirring, patience.
- Using raw nuts: Roasted nuts deliver better flavor and crunch. If using raw, toast them first for 6–8 minutes at 350°F.
- Cutting too soon: Warm chocolate smears and marshmallow drags.
Chill and use a hot knife for clean bakery-style squares.
- Broiler bravado: Marshmallows burn in seconds. Stay put and watch. Blink and you’ve got charcoal.
Variations You Can Try
- Turtle Mode: Swap peanuts for pecans and drizzle extra caramel over the toasted marshmallows.
Finish with flaky salt.
- Espresso Kick: Stir 1 teaspoon instant espresso into the melted chocolate for a mocha vibe. Adults will notice; kids won’t complain.
- PB Party: Swirl 1/3 cup warmed peanut butter into the chocolate layer before adding marshmallows. Absolute chaos—in a good way.
- Gluten-Free: Use certified GF graham crackers.
Everything else stays the same.
- Almond Joy Energy: Use almonds, add 1/2 cup toasted coconut flakes to the chocolate layer, and finish with dark chocolate.
- Spice Route: Add 1/2 teaspoon cinnamon and a pinch of cayenne to the graham crust. Sweet heat? Yes, chef.
- White Chocolate Contrast: Half semisweet, half white chocolate in a marbled layer.
Looks fancy, takes zero extra talent.
FAQ
Can I make these without nuts?
Absolutely. Skip the nuts or sub in crushed pretzels for crunch. If allergies are a concern, check caramel and chocolate labels for shared equipment warnings.
Do I have to use heavy cream in the caramel?
Heavy cream gives the smoothest texture.
In a pinch, use half-and-half or evaporated milk. Avoid regular milk—it can make the caramel grainy.
How do I prevent the crust from crumbling?
Press the crust firmly and bake it briefly to set the butter. If it’s still sandy, add 1–2 more tablespoons melted butter and recompress.
Cooling before layering also helps.
What’s the best way to cut clean squares?
Chill the pan until the chocolate is set, then use a long, sharp knife warmed under hot water and wiped dry. Wipe the blade between cuts. Yes, it’s extra, but your squares will look pro.
Which nuts taste best in this?
Pecans bring buttery richness, peanuts add classic candy-bar vibes, and almonds give a toasty snap.
Use what you like—or mix. IMO, pecans + dark chocolate = chef’s kiss.
Can I double the recipe?
Yes, use a 9×13-inch pan and increase bake times slightly. Watch the marshmallow toasting step closely—bigger surface area means faster browning under the broiler.
How long do they keep?
Three days at room temperature, five in the fridge, and two months in the freezer.
Texture is best within 48 hours, but honestly, they rarely last that long.
What chocolate percentage works best?
Semisweet (50–60%) is the safe middle ground. If you love deeper cocoa notes, go 70%. Milk chocolate makes them sweeter and softer—good if serving kids or sweet-tooths.
Can I use marshmallow creme instead?
You can, but it won’t toast the same and can get messy.
If using, spread a thin layer over cooled chocolate and skip the oven step. Finish with a torch if you’ve got one.
How do I make them less sweet?
Use dark chocolate, reduce caramel by 2–3 tablespoons, add extra flaky salt, and choose unsweetened roasted nuts. A pinch of espresso powder also balances sweetness.
My Take
These Chocolaty Caramel-Nut S’more Bars are the dessert equivalent of a mic drop—simple steps, blockbuster payoff.
They nail the contrast game: crunchy base, molten middle, plush top. And the best part? They tolerate tweaks like a champ, so you can flex your preferences without messing up the fundamentals.
Make them for a crowd, or make them for “a crowd” and keep half in the freezer for future-you.
FYI: future-you will be very grateful. Now go claim your hero status—one gooey square at a time.
Printable Recipe Card
Want just the essential recipe details without scrolling through the article? Get our printable recipe card with just the ingredients and instructions.