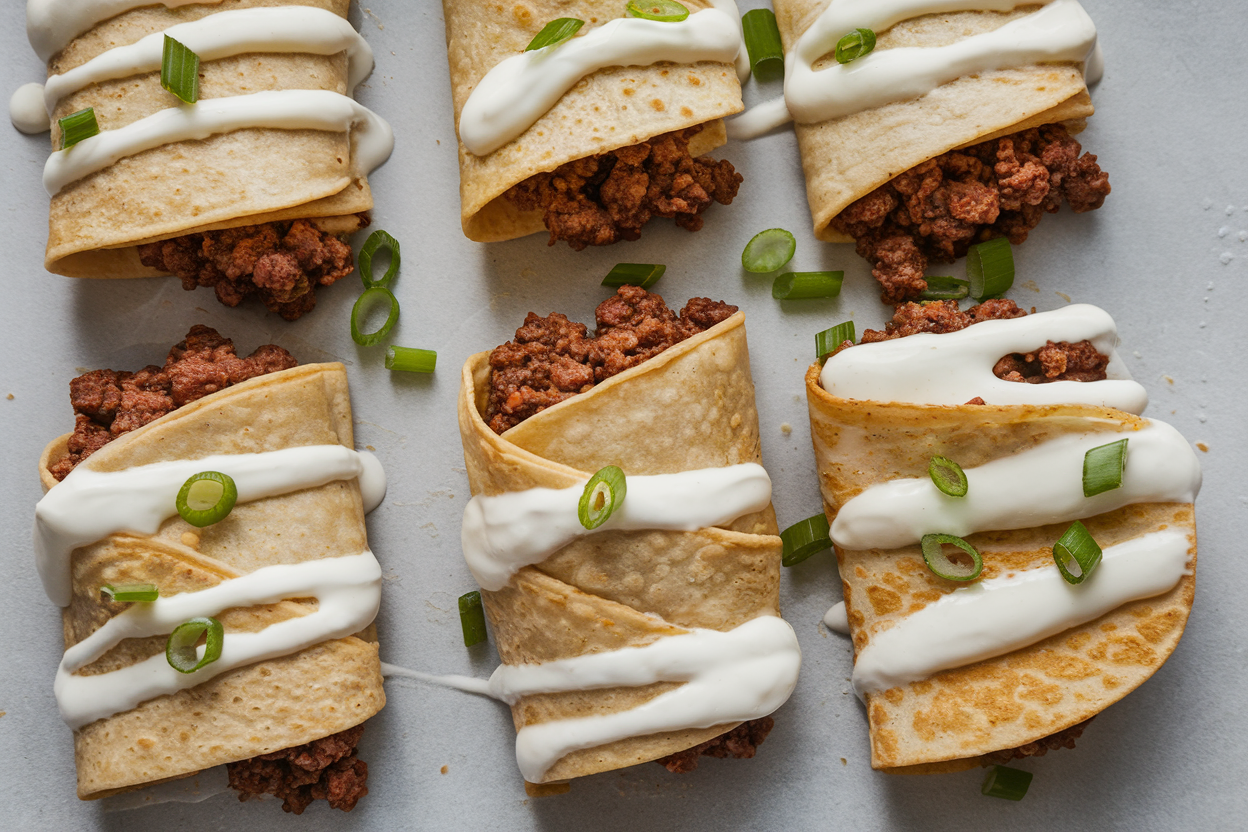
5-Minute Quesadilla Roll-Ups: The Snack Hack You’ll Brag About All Week
You’re 300 seconds away from melting cheese glory. No oven drama, no culinary flex required—just a hot pan and a craving for something crispy, cheesy, and wildly snackable. These 5-Minute Quesadilla Roll-Ups turn pantry basics into a craveable, handheld win that fits in your bag, your kid’s lunchbox, or your midnight fridge raid.
Think: gooey center, golden exterior, addictive crunch. You’ll make one to “test” and then, shocker, suddenly you’ve made six. Coincidence?
Not really.
Why This Recipe Works
Speed meets satisfaction. Rolling the tortilla instead of folding creates more surface area for crisping and seals in the cheese faster, giving you that telltale stretch without leakage. The compact shape also means even heating—no sad cold spots.
Using two cheeses (or a melt-forward cheese like mozzarella, cheddar, or Oaxaca) delivers the right pull while a sprinkle of spices wakes up the flavor instantly. A light swipe of butter or oil = blistered edges and a diner-style toast. End result: snack-bar energy with zero wait time.
Shopping List – Ingredients
- Flour tortillas (6-inch or 8-inch; smaller rolls crisper, bigger rolls cheesier)
- Shredded cheese (1/2 to 3/4 cup per 2 tortillas; cheddar, Monterey Jack, mozzarella, or a blend)
- Butter or neutral oil (1–2 teaspoons for the pan)
- Salt and black pepper
- Optional flavor boosters:
- Ground cumin or chili powder
- Garlic powder or onion powder
- Thinly sliced scallions or red onion
- Pickled jalapeños (drained)
- Cooked protein: shredded chicken, chopped steak, or black beans
- Fresh cilantro
- Dip options: salsa, guacamole, sour cream, or hot honey (trust me)
How to Make It – Instructions
- Heat the pan. Place a nonstick skillet over medium heat.
Add 1–2 teaspoons of butter or oil. You want a light sheen, not a Jacuzzi.
- Prep the tortilla. Lay a tortilla flat. Sprinkle 1/4–1/3 cup shredded cheese in a line about 1 inch from the edge.
Add a pinch of salt, pepper, and any spices. Keep fillings minimal so it rolls tight.
- Roll it up. Tightly roll the tortilla over the cheese line into a compact cigar shape. Press the seam down lightly so it sticks.
If it fights back, add a smear of cheese at the seam for “glue.”
- Toast the seam side first. Place the roll seam-side down in the hot pan. Cook 45–60 seconds until lightly golden and the seam seals.
- Rotate for even crisping. Roll the quesadilla a quarter turn every 30–45 seconds to toast all sides. Total time is about 2–3 minutes, depending on heat and tortilla size.
- Repeat, assembly-line style. As the first one finishes, assemble the next.
You’ll have a steady stream of hot roll-ups in under 5 minutes.
- Serve immediately. Slice into bite-size pieces or keep whole. Dip in salsa, guac, or a swirl of hot honey if you’re feeling chaotic (in a good way).
Storage Instructions
- Fridge: Cool completely, then store in an airtight container for up to 3 days. Reheat in a skillet or air fryer for 2–3 minutes to re-crisp.
Microwave only if you like sad tortillas (please don’t).
- Freezer: Wrap tightly in foil or parchment, then place in a freezer bag. Freeze up to 2 months. Reheat from frozen in a skillet over medium-low with a lid for 6–8 minutes, turning occasionally.
- Make-ahead: Assemble un-cooked rolls, refrigerate up to 24 hours.
Cook just before serving for best texture.
Why This is Good for You
Balance beats perfection. A roll-up with cheese and a thin tortilla offers protein and carbs for quick energy, and you can sneak in fiber with whole-wheat tortillas or black beans. Add jalapeños or salsa for vitamin C and a metabolism nudge.
Using a nonstick pan and a teaspoon of oil keeps fats in check while still delivering that satisfying sear. And because it’s fast, you’re less likely to default to ultra-processed snacks—small win, big ROI.
Pitfalls to Watch Out For
- Overfilling. Tempting, I know. But too much cheese or add-ins = blowouts and uneven melting.
Aim for a thin line of filling.
- Heat too high. Burnt outside, cold inside is not the vibe. Medium heat gives you melt plus crisp.
- Wet add-ins. Drippy salsa or juicy veggies make soggy roll-ups. Pat fillings dry or add them as a dip.
- Skipping the seam seal. Always start seam-side down so it fuses.
Otherwise, you’re eating a spring-loaded cheese slinky.
- Wrong cheese. Pre-shredded is fine, but choose a melty variety. Dry, low-moisture cheese won’t give you the stretch.
Mix It Up
- Pizza roll-up: Mozzarella + pepperoni + a swipe of marinara inside; dip in extra sauce.
- Street-corn vibes: Cotija + Jack, chili powder, and a squeeze of lime after cooking; drizzle with a little mayo or crema.
- BBQ chicken: Shredded chicken + cheddar + BBQ sauce; finish with chopped scallions.
- Breakfast mode: Soft-scrambled eggs + pepper Jack; add hot sauce and chives.
- Veggie crunch: Black beans + corn + cumin + a little feta; serve with avocado.
- Spicy-sweet: Cheddar + pickled jalapeños; finish with hot honey (FYI: dangerously good).
- Glow-up tortillas: Try spinach or whole-wheat tortillas for extra fiber and flair.
FAQ
Can I use corn tortillas?
Yes, but they’re more delicate. Warm them first until pliable and consider doubling up.
A tiny swipe of cheese at the seam helps glue it shut. Expect a little more crackle and a little less rollability.
What’s the best cheese for melting?
Monterey Jack, mozzarella, Oaxaca, and mild cheddar melt beautifully. Blends are clutch: half mozzarella for pull, half cheddar for flavor.
Avoid super-aged cheeses on their own—they don’t melt as smoothly.
Air fryer or stovetop?
Both work. For air fryer: brush rolls lightly with oil, air-fry at 380°F for 4–6 minutes, turning once. Stovetop is faster and gives better control, IMO, but the air fryer wins on batch size.
How do I keep them from unrolling?
Roll tightly, start seam-side down, and cook the seam first to seal.
If you’re adding chunky fillings, keep them minimal and centered so they don’t pry the roll open.
Are they kid-friendly?
Absolutely. Keep it simple with cheese and a mild spice. Slice into pinwheels for smaller hands, and serve with yogurt ranch or salsa for dipping.
It’s lunchbox gold.
Gluten-free options?
Use gluten-free flour tortillas designed for flexibility. Warm them briefly to prevent cracking, and handle gently while rolling. The method stays the same.
What oil works best?
Neutral oils like avocado or canola give a clean crisp.
Butter adds flavor and browning. A 50/50 mix is the sweet spot if you want both durability and taste.
Can I add raw veggies inside?
Yes, but keep them thin and dry (think shredded zucchini squeezed out, or paper-thin bell peppers). Too much moisture ruins crispiness.
Alternatively, add fresh veg on the side and keep the roll-up pure.
How do I scale for a party?
Pre-roll a dozen, keep in the fridge, then cook in batches on two pans or use a griddle. Hold finished roll-ups on a wire rack in a 200°F oven so they stay crisp, not sweaty.
What dips pair best?
Classics: salsa, guacamole, sour cream. Curveballs: chipotle mayo, hot honey, cilantro-lime yogurt, or a drizzle of tajín-laced crema.
Pick one creamy, one spicy, one tangy for a full spectrum.
My Take
These 5-Minute Quesadilla Roll-Ups are the ultimate leverage play: minimal effort, maximum payoff. They scratch the itch for something hot, crunchy, and cheesy without wrecking your schedule or your kitchen. Once you master the tight roll and the seam-first toast, you can riff endlessly—breakfast to midnight snack.
Keep tortillas and cheese on standby and you’ve basically hacked your hunger. Fast, flexible, and fun—exactly how weeknight cooking should feel.
Printable Recipe Card
Want just the essential recipe details without scrolling through the article? Get our printable recipe card with just the ingredients and instructions.